Do you need to enable a colleague to manage your local business listings or answer customer reviews?
The “Share Locations” feature provides several options to grant other users access to a location you own or manage, or to update other users’ current access by assigning them a role.
What Are the Different Types of Users in Local Tools?
In Semrush Local tools, users can have one of four different roles, each with unique limitations:
- Account owner: The primary Semrush account owner for your organization or team, if you’re using a corporate account. Corporate owners can buy and distribute limits, create and manage locations as a location owner, and view all locations created by their sub-users.
- Location owner: Typically, the person who created the location. This user has full access to all supported features in the Listing and Review Management tools, including the ability to edit and share locations, add new locations, upgrade the location type, connect Facebook and Google Business Profile accounts, view and manage reviews, enable auto-reply, and pull Competitor Review reports.
- Editor: This user has access to most supported features, similar to a Location Owner. However, Editors cannot upgrade, share, or delete a location. Additionally, Editors do not have access to the Duplicates or User Suggestions reports in the Listing Management tool.
- Viewer: This user can view listings and reviews, see the status of auto-replies (enabled/disabled), and view existing Competitor Review reports.
Please note: To gain access to full editor functionality, you’ll need to be associated with a paid Semrush subscription, either individually or by being added to a corporate account.
If you're granted Editor access to a location but don't have an active Local Toolkit subscription, you'll see a message explaining that editing is locked until you either:
- Request collaboration to join the account owner's corporate account as an additional user
- Purchase a Local Toolkit plan for your own individual account
If you're a member of a corporate account, other members can also invite you directly using the Share button.
How To Share Locations
To share multiple locations, first open your list of locations in any of the Local tools: GBP optimization, Listing Management, Review Management, or Local Dashboard.
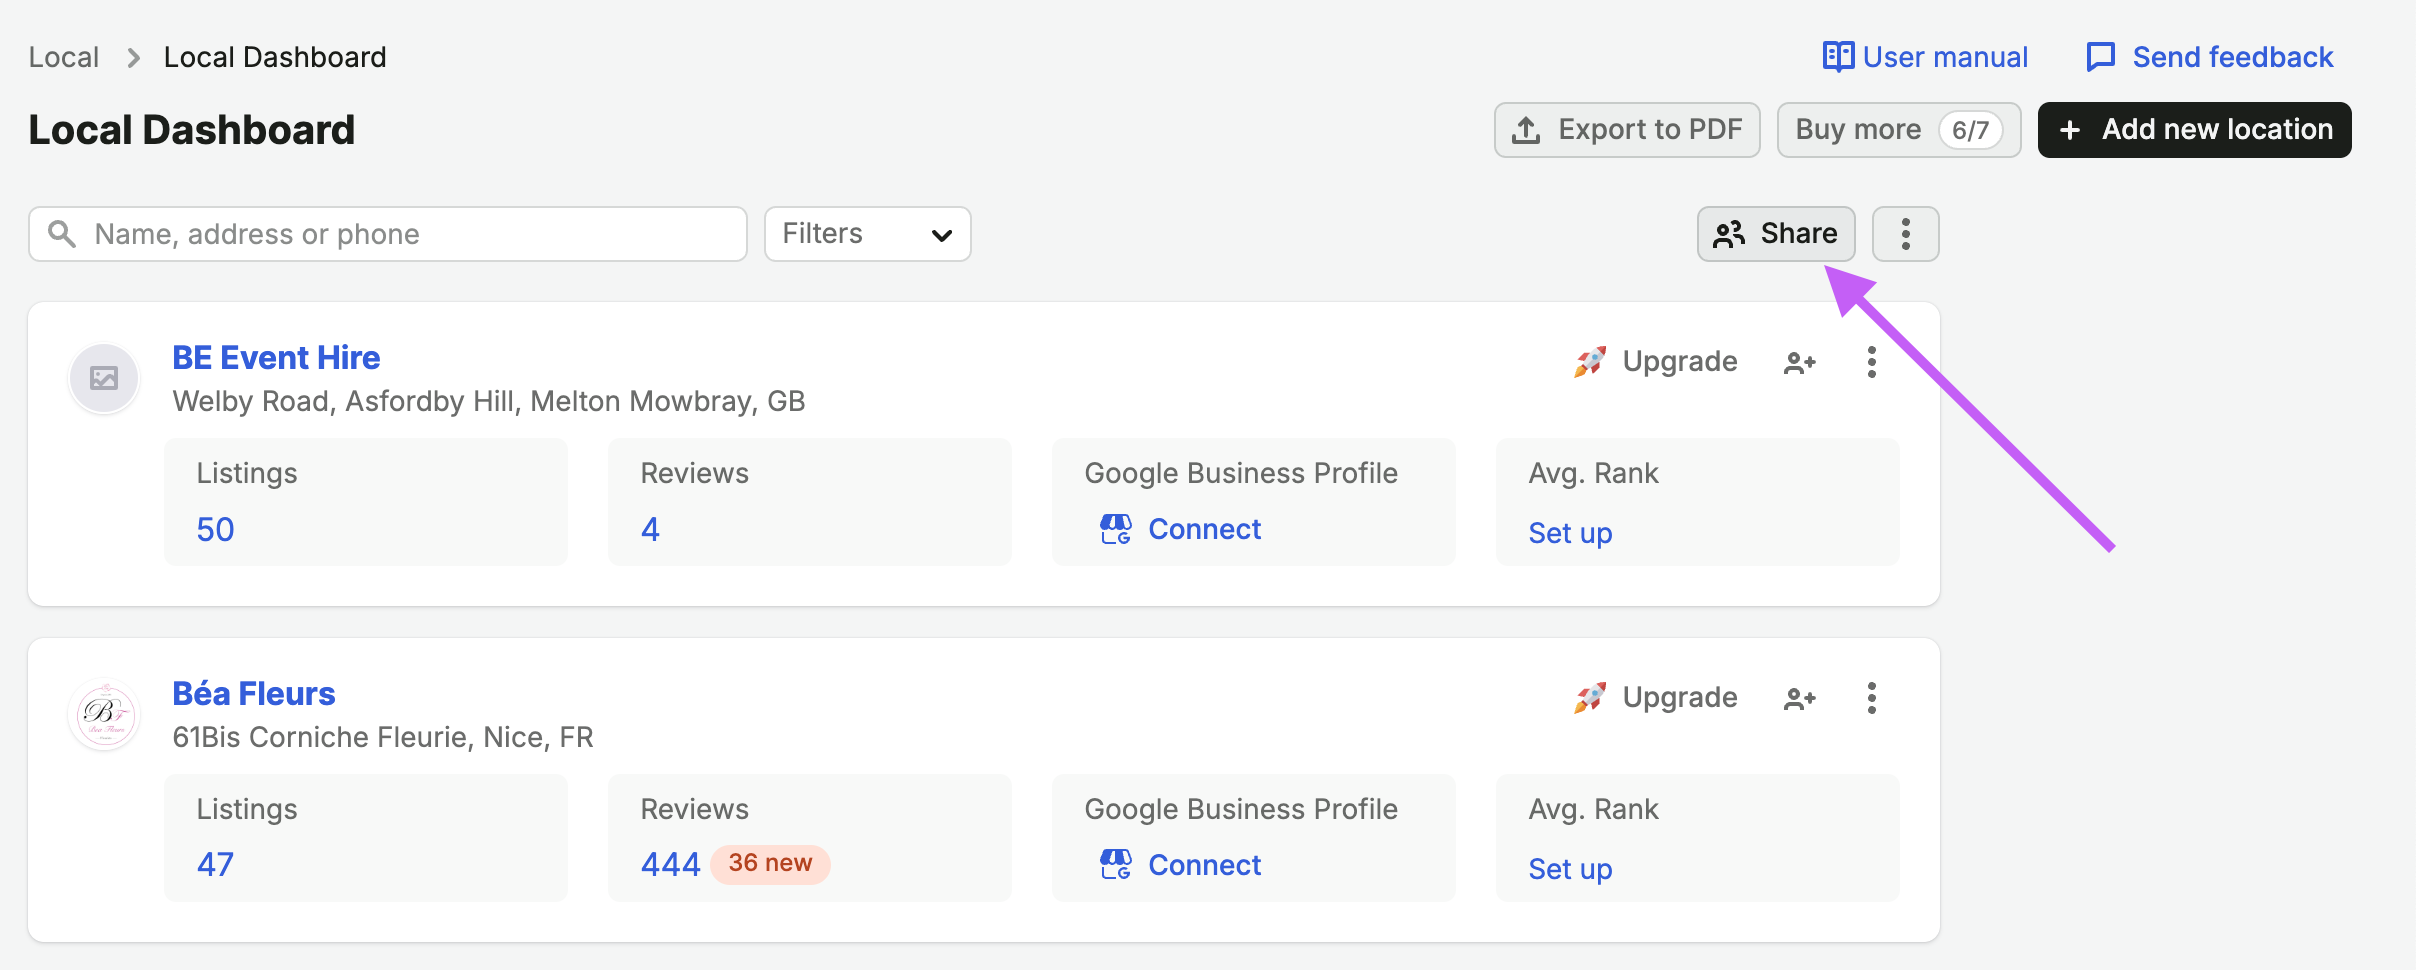
To share one or more of these locations, click the Share button in the top right corner.
This will open the Share Locations window. Use the drop-down to select the locations you want to share. This list will only include locations that you own. If you were granted editor or viewer access to a location, you will not be able to select it.
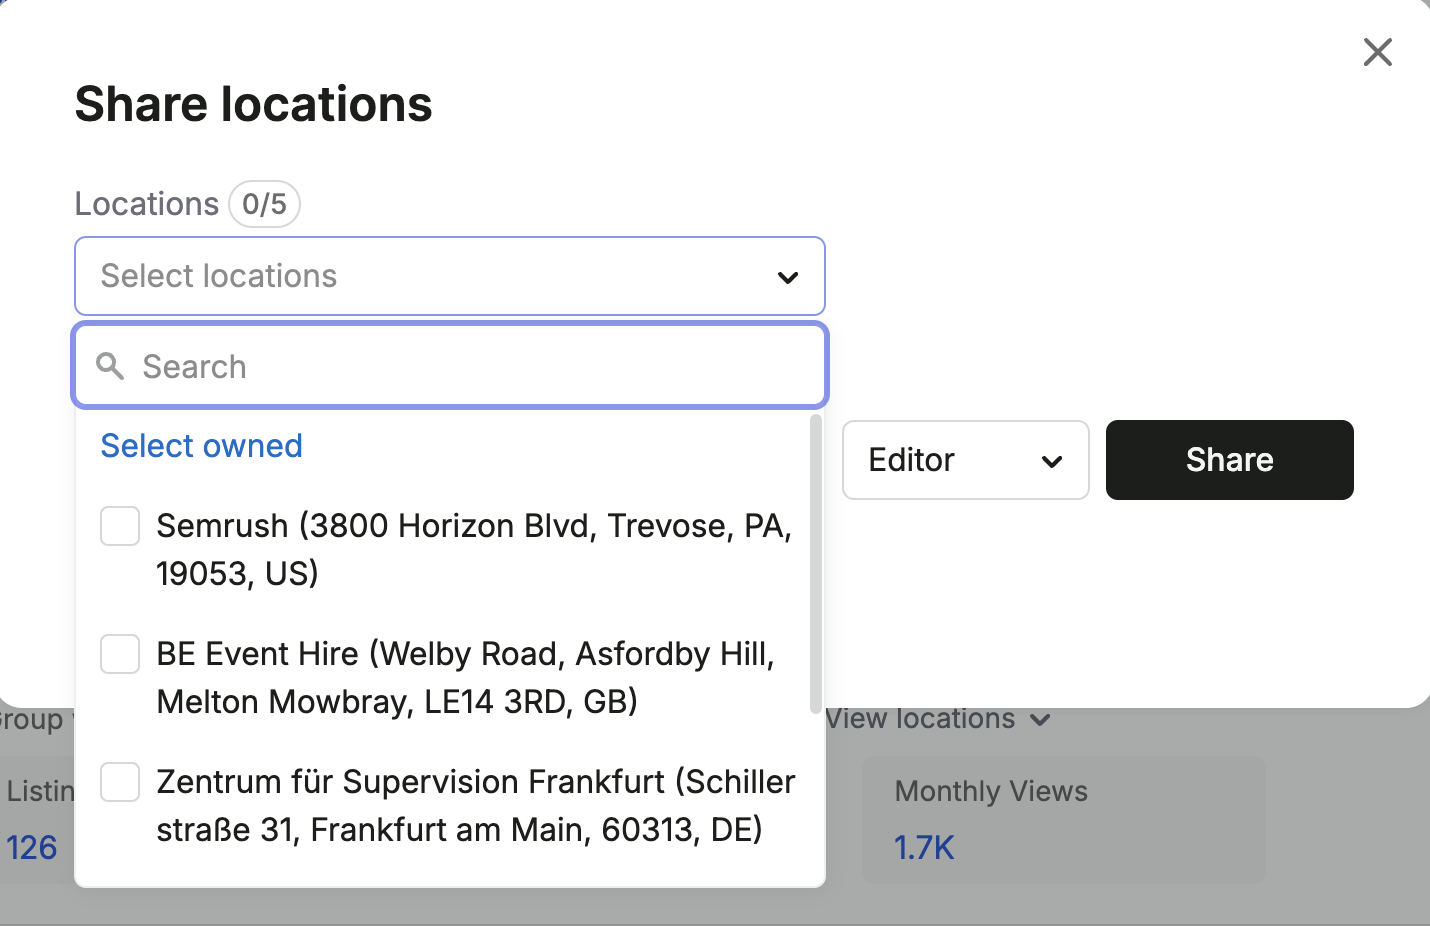
Please note, if you want to share different locations with different people, you will need to repeat this step to share each location or group of locations separately.
Next, enter the email addresses of each individual you want to share your selected locations with and use the drop-down to the right to assign their role.
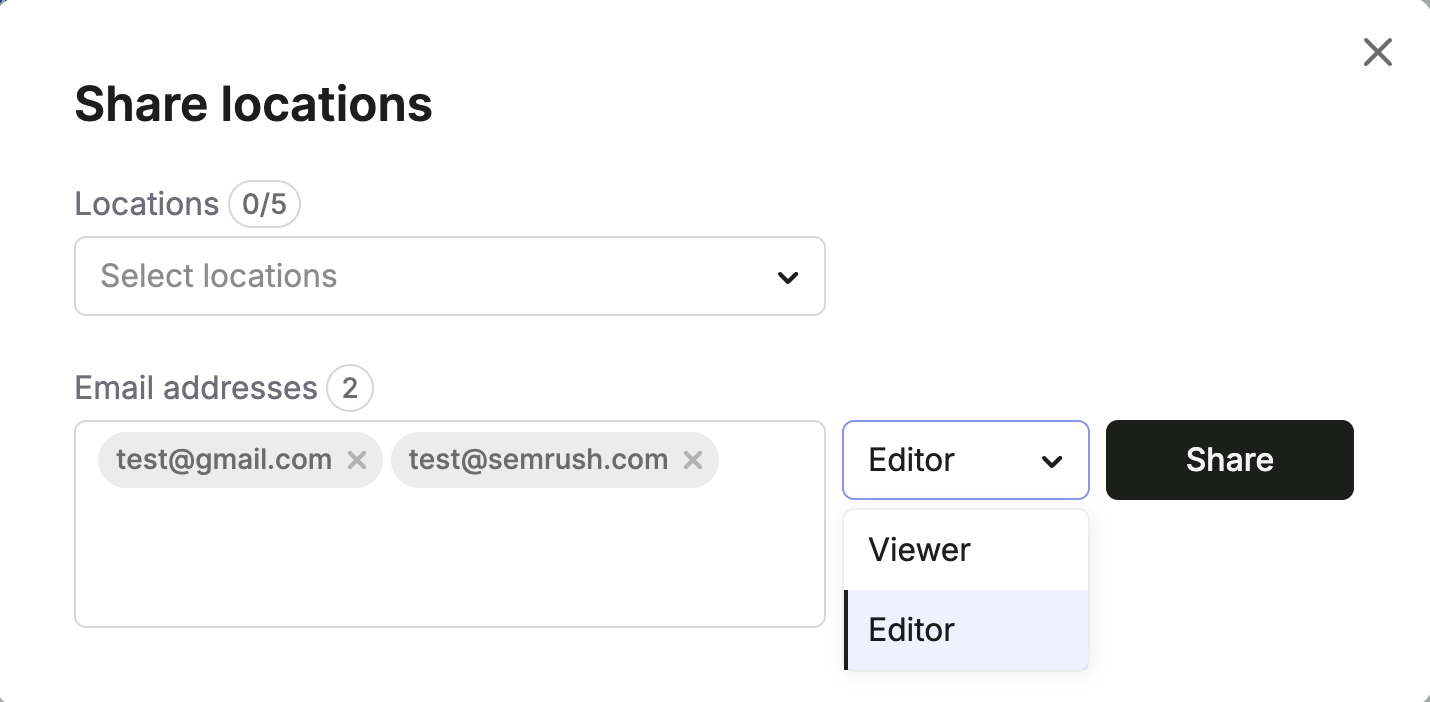
This drop-down assigns the same role to all the email addresses that you entered. As such, if you need to assign different roles, you’ll need to repeat this process and share separately.
Once you’re ready, click the Share button to complete the sharing process.
Accessing Shared Locations
If someone invites you to view or edit their location, you’ll receive an email invitation.
If you were invited to view the location, all you need to do is click “Open in Semrush” and create or log into your account to view it.
If you were granted editor access, you’ll need a Semrush subscription in order to use these features. Learn more about Semrush plans on our pricing page.
Going forward, all locations you have access to will appear in the Locations tab. However, you’ll only be able to share the locations you own.
Managing User Access & Permissions
You can manage user access to your locations by using the Share Locations window.
As with the location-sharing process described above, first, visit the Locations tab, then click Share at the top right corner.
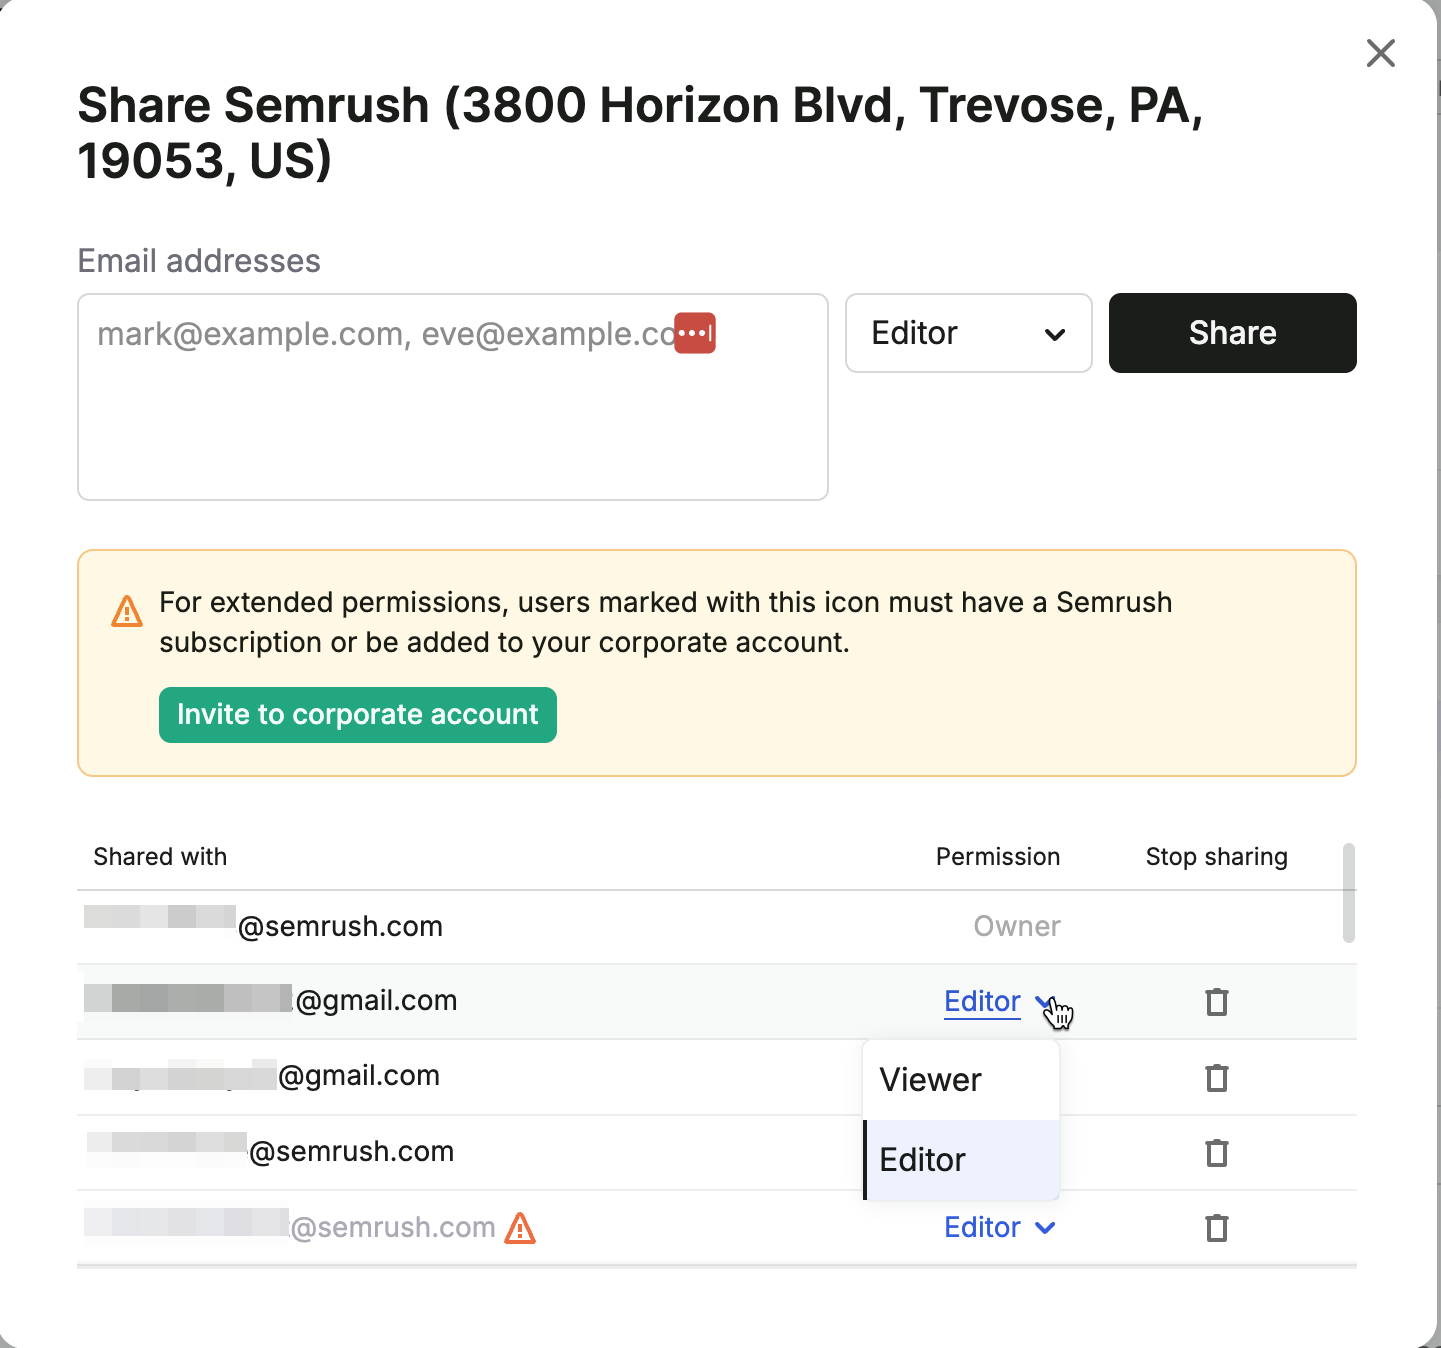
At the bottom of the Share Locations window, you’ll see a list of everyone you have already granted access to, indicated by email address, along with the permissions you assigned them.
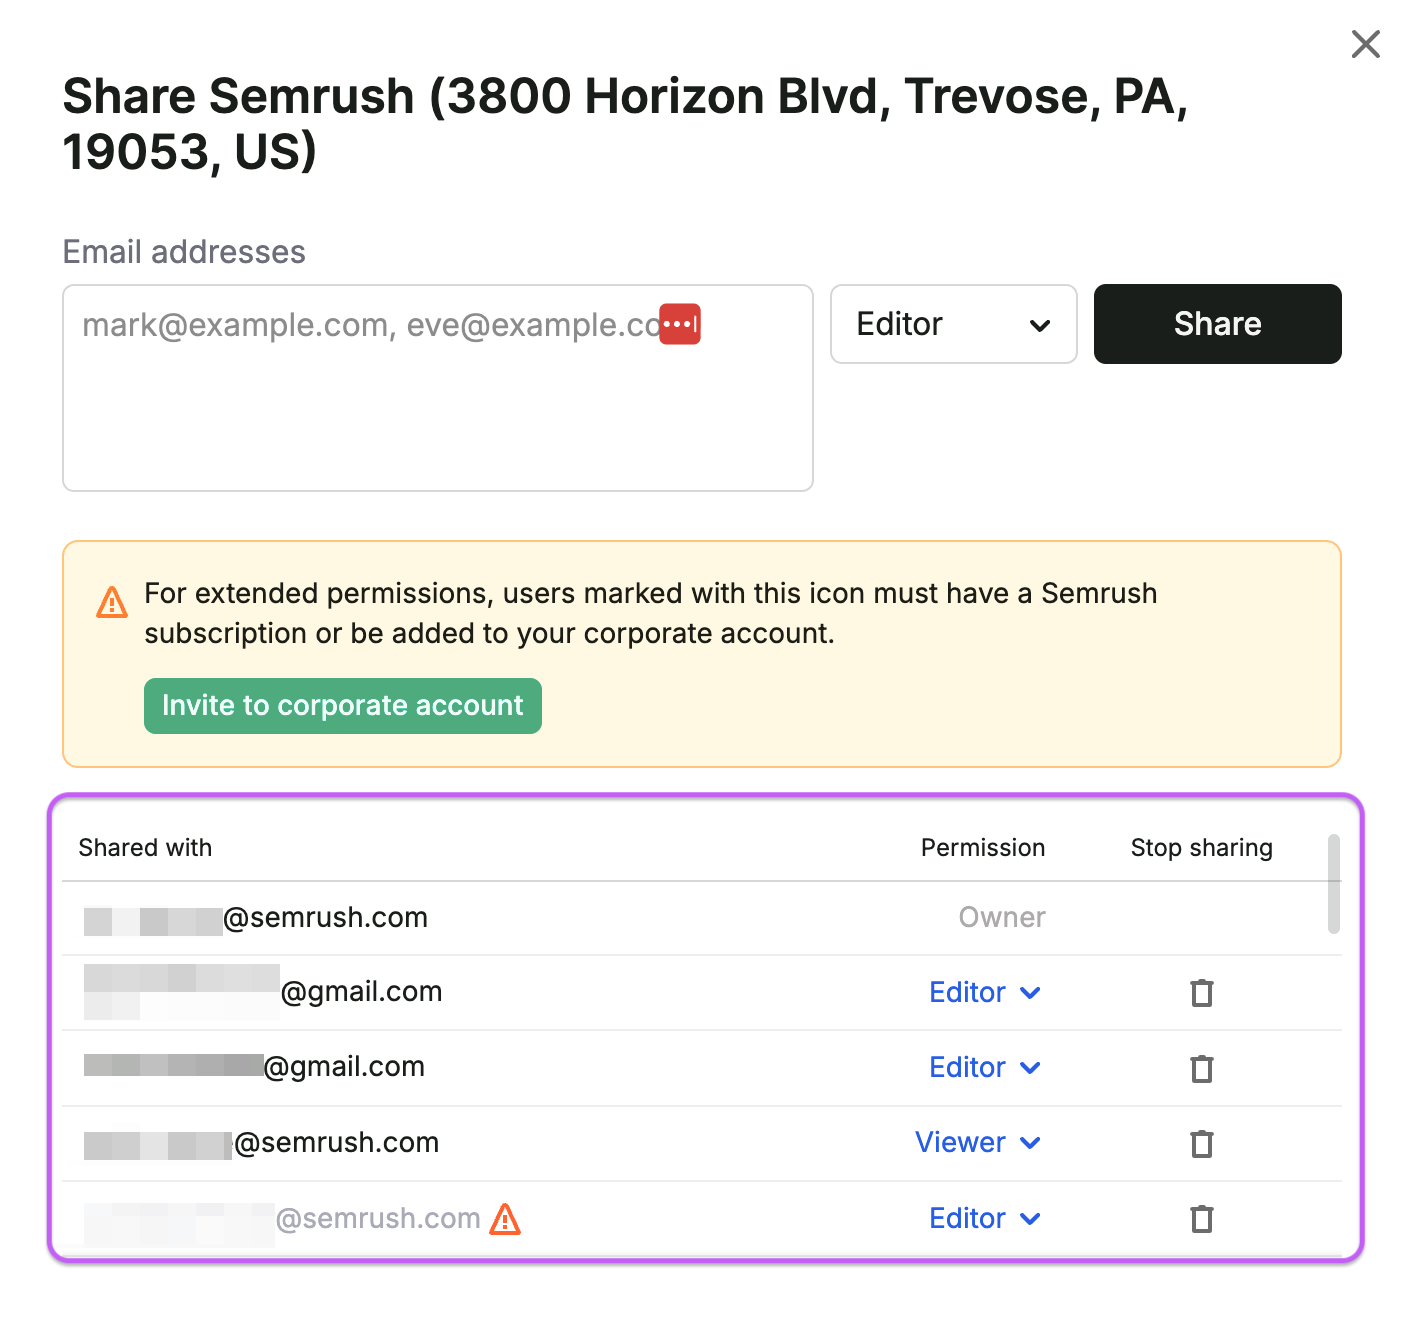
To change a user’s permissions, simply click on their role in the Permissions column. This will open a drop-down menu, where you can select a new user role to update their level of access.
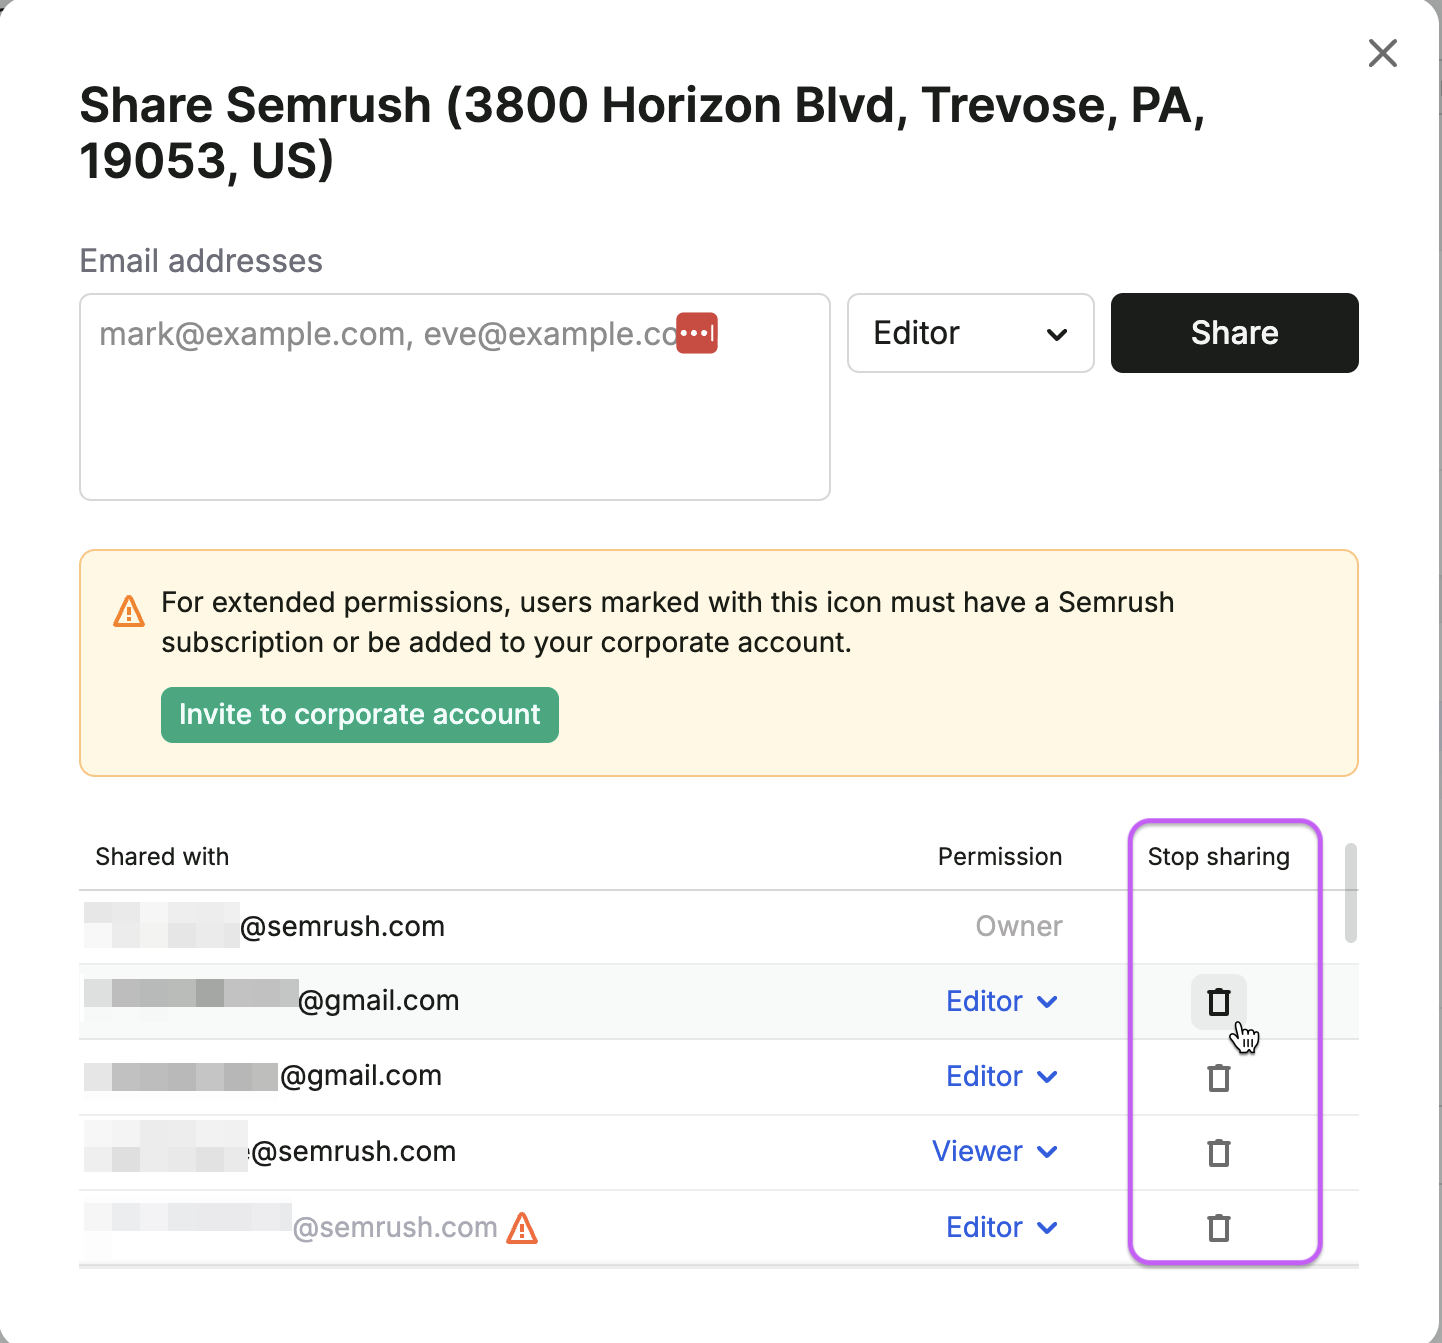
To revoke access from a user, click the trash bin icon under the “Stop sharing” column.
 Back to Semrush Toolkits category